Reflection photography can get you some truly gorgeous photos.
But how do you capture amazing reflections? What are the secrets to consistently beautiful reflection photography?
That’s what this article is all about.
I’m going to share with you everything you to know about reflections–so that you can capture beautiful reflection photos, time and time again.
If that sounds good to you…
…then read on!
Reflection Photography Explained:
What Is Reflection Photography?
Reflection photography involves photographing reflections of any kind.
You can use common reflective surfaces for perfect reflections. But you’re also free to create partial reflections or muddy reflections using less reflective surfaces, or by photographing only a sliver of the reflection.
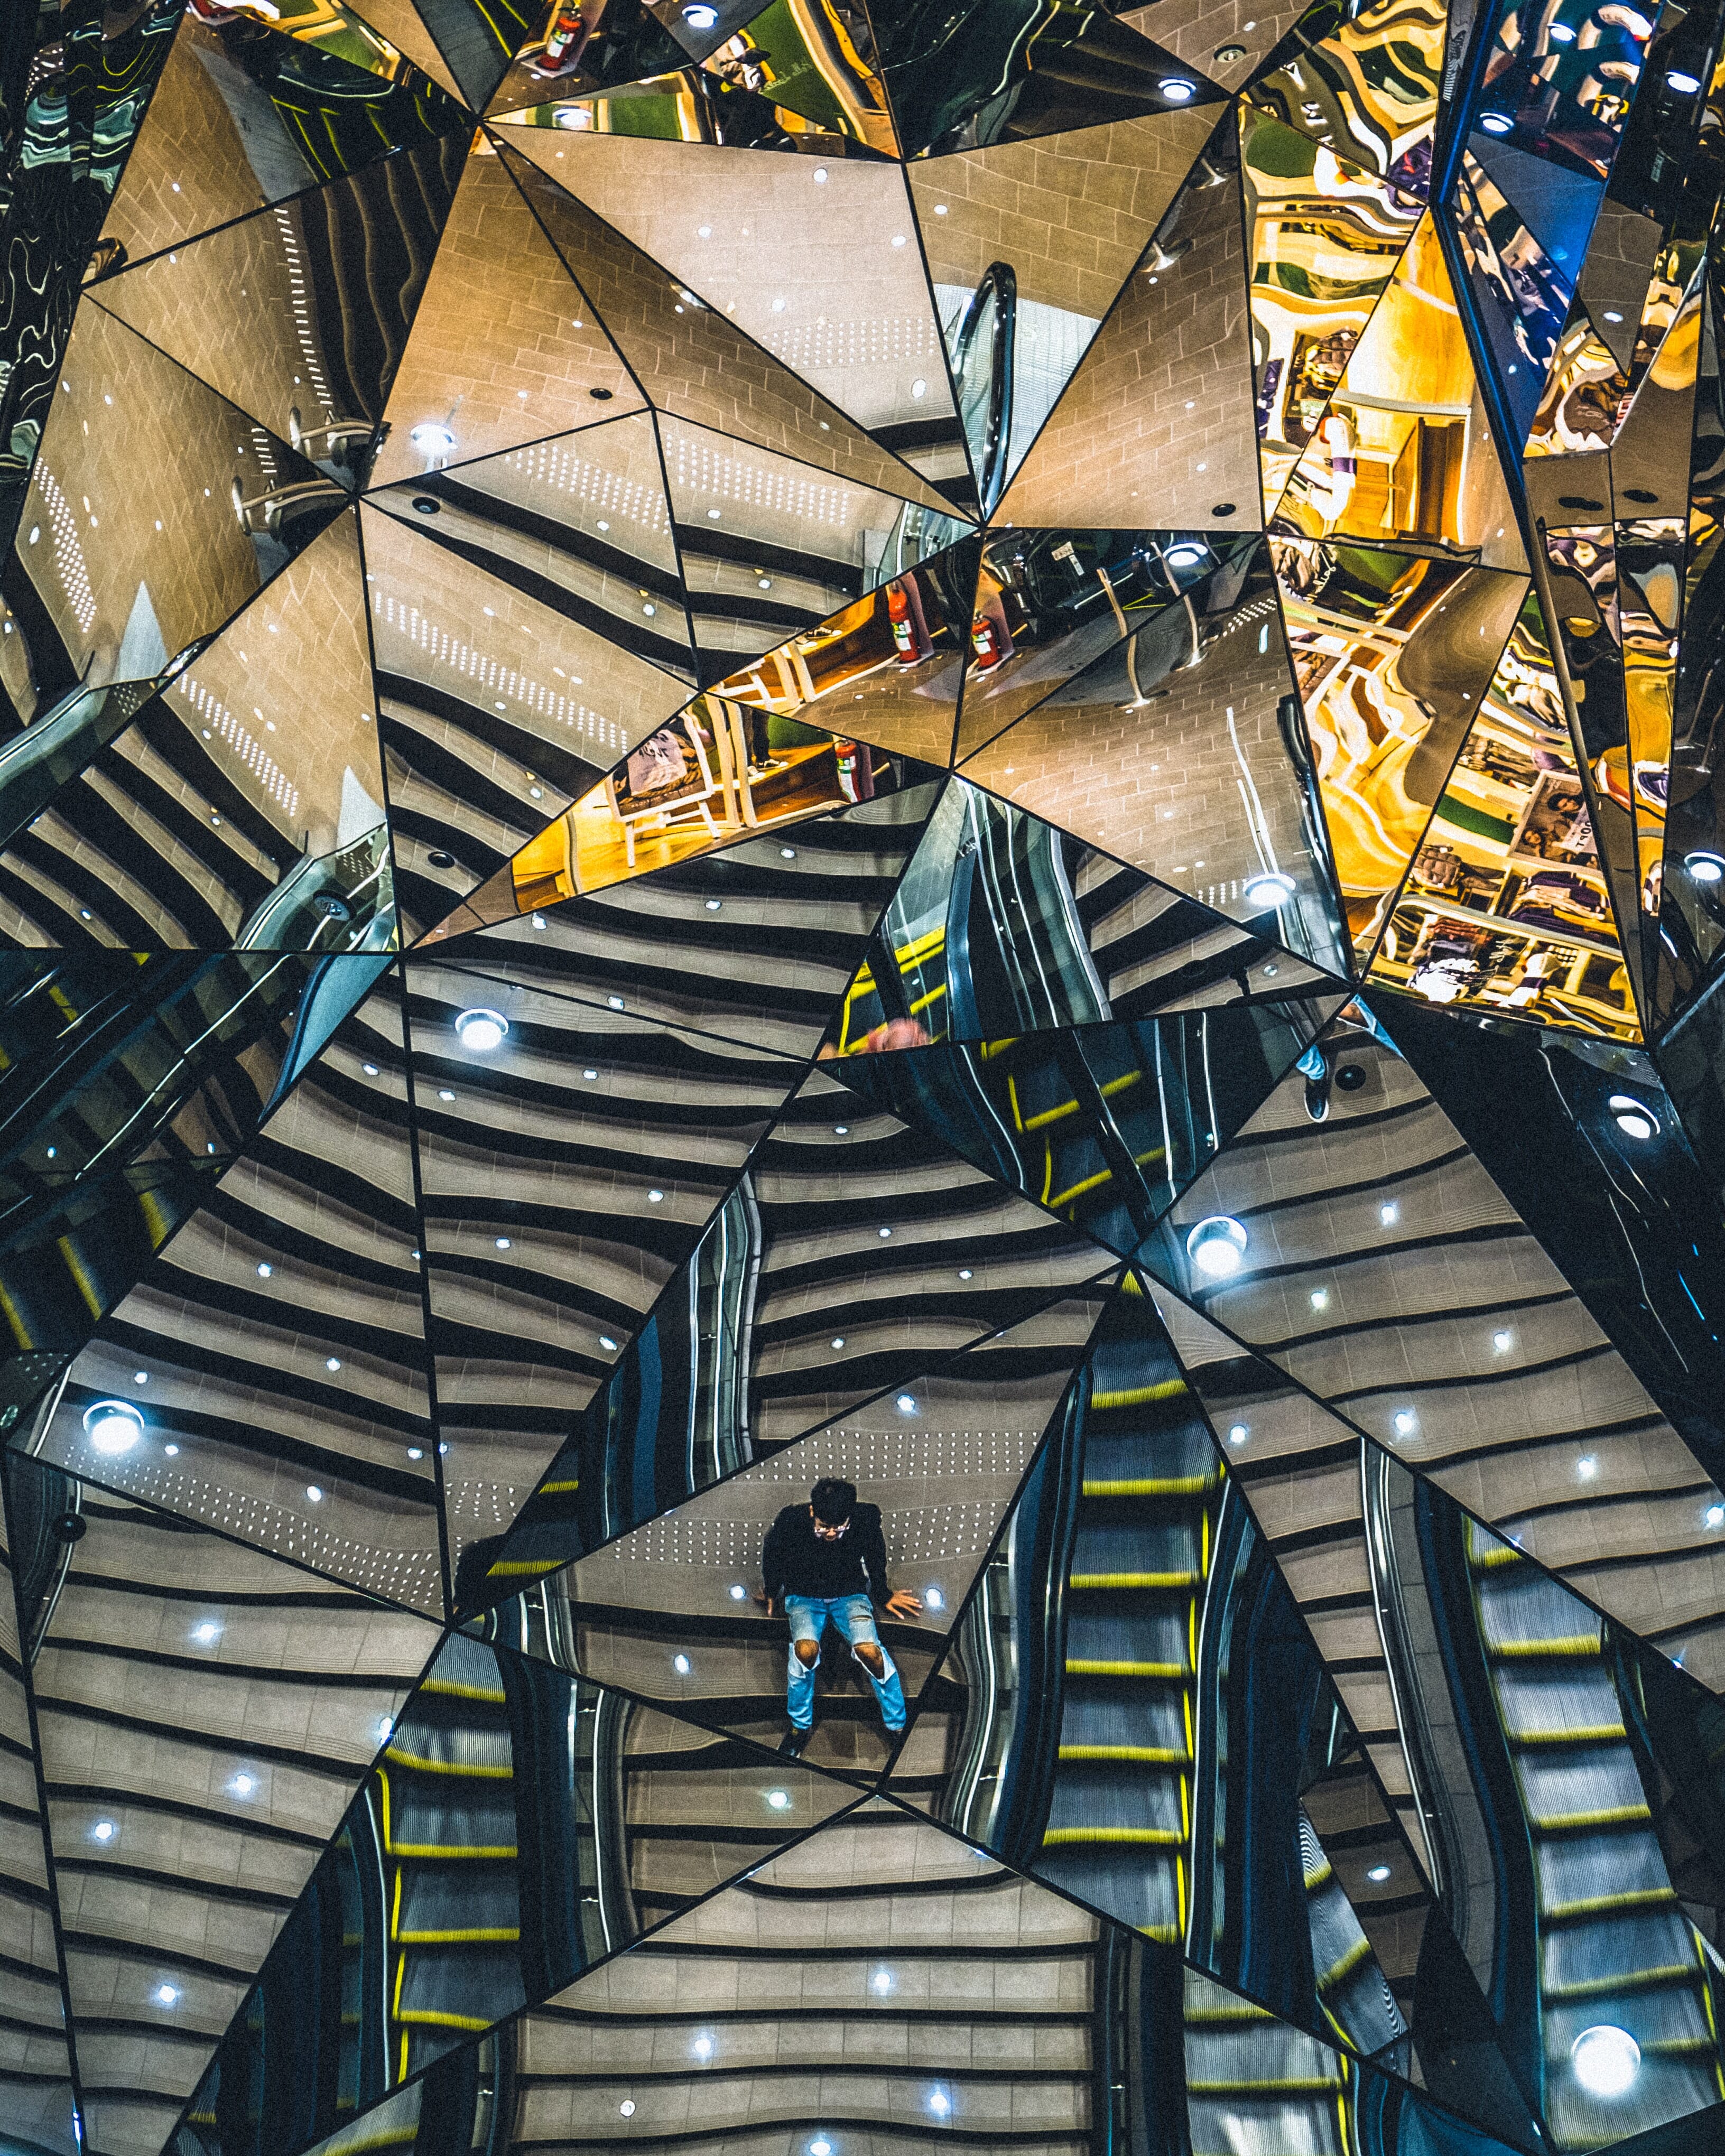
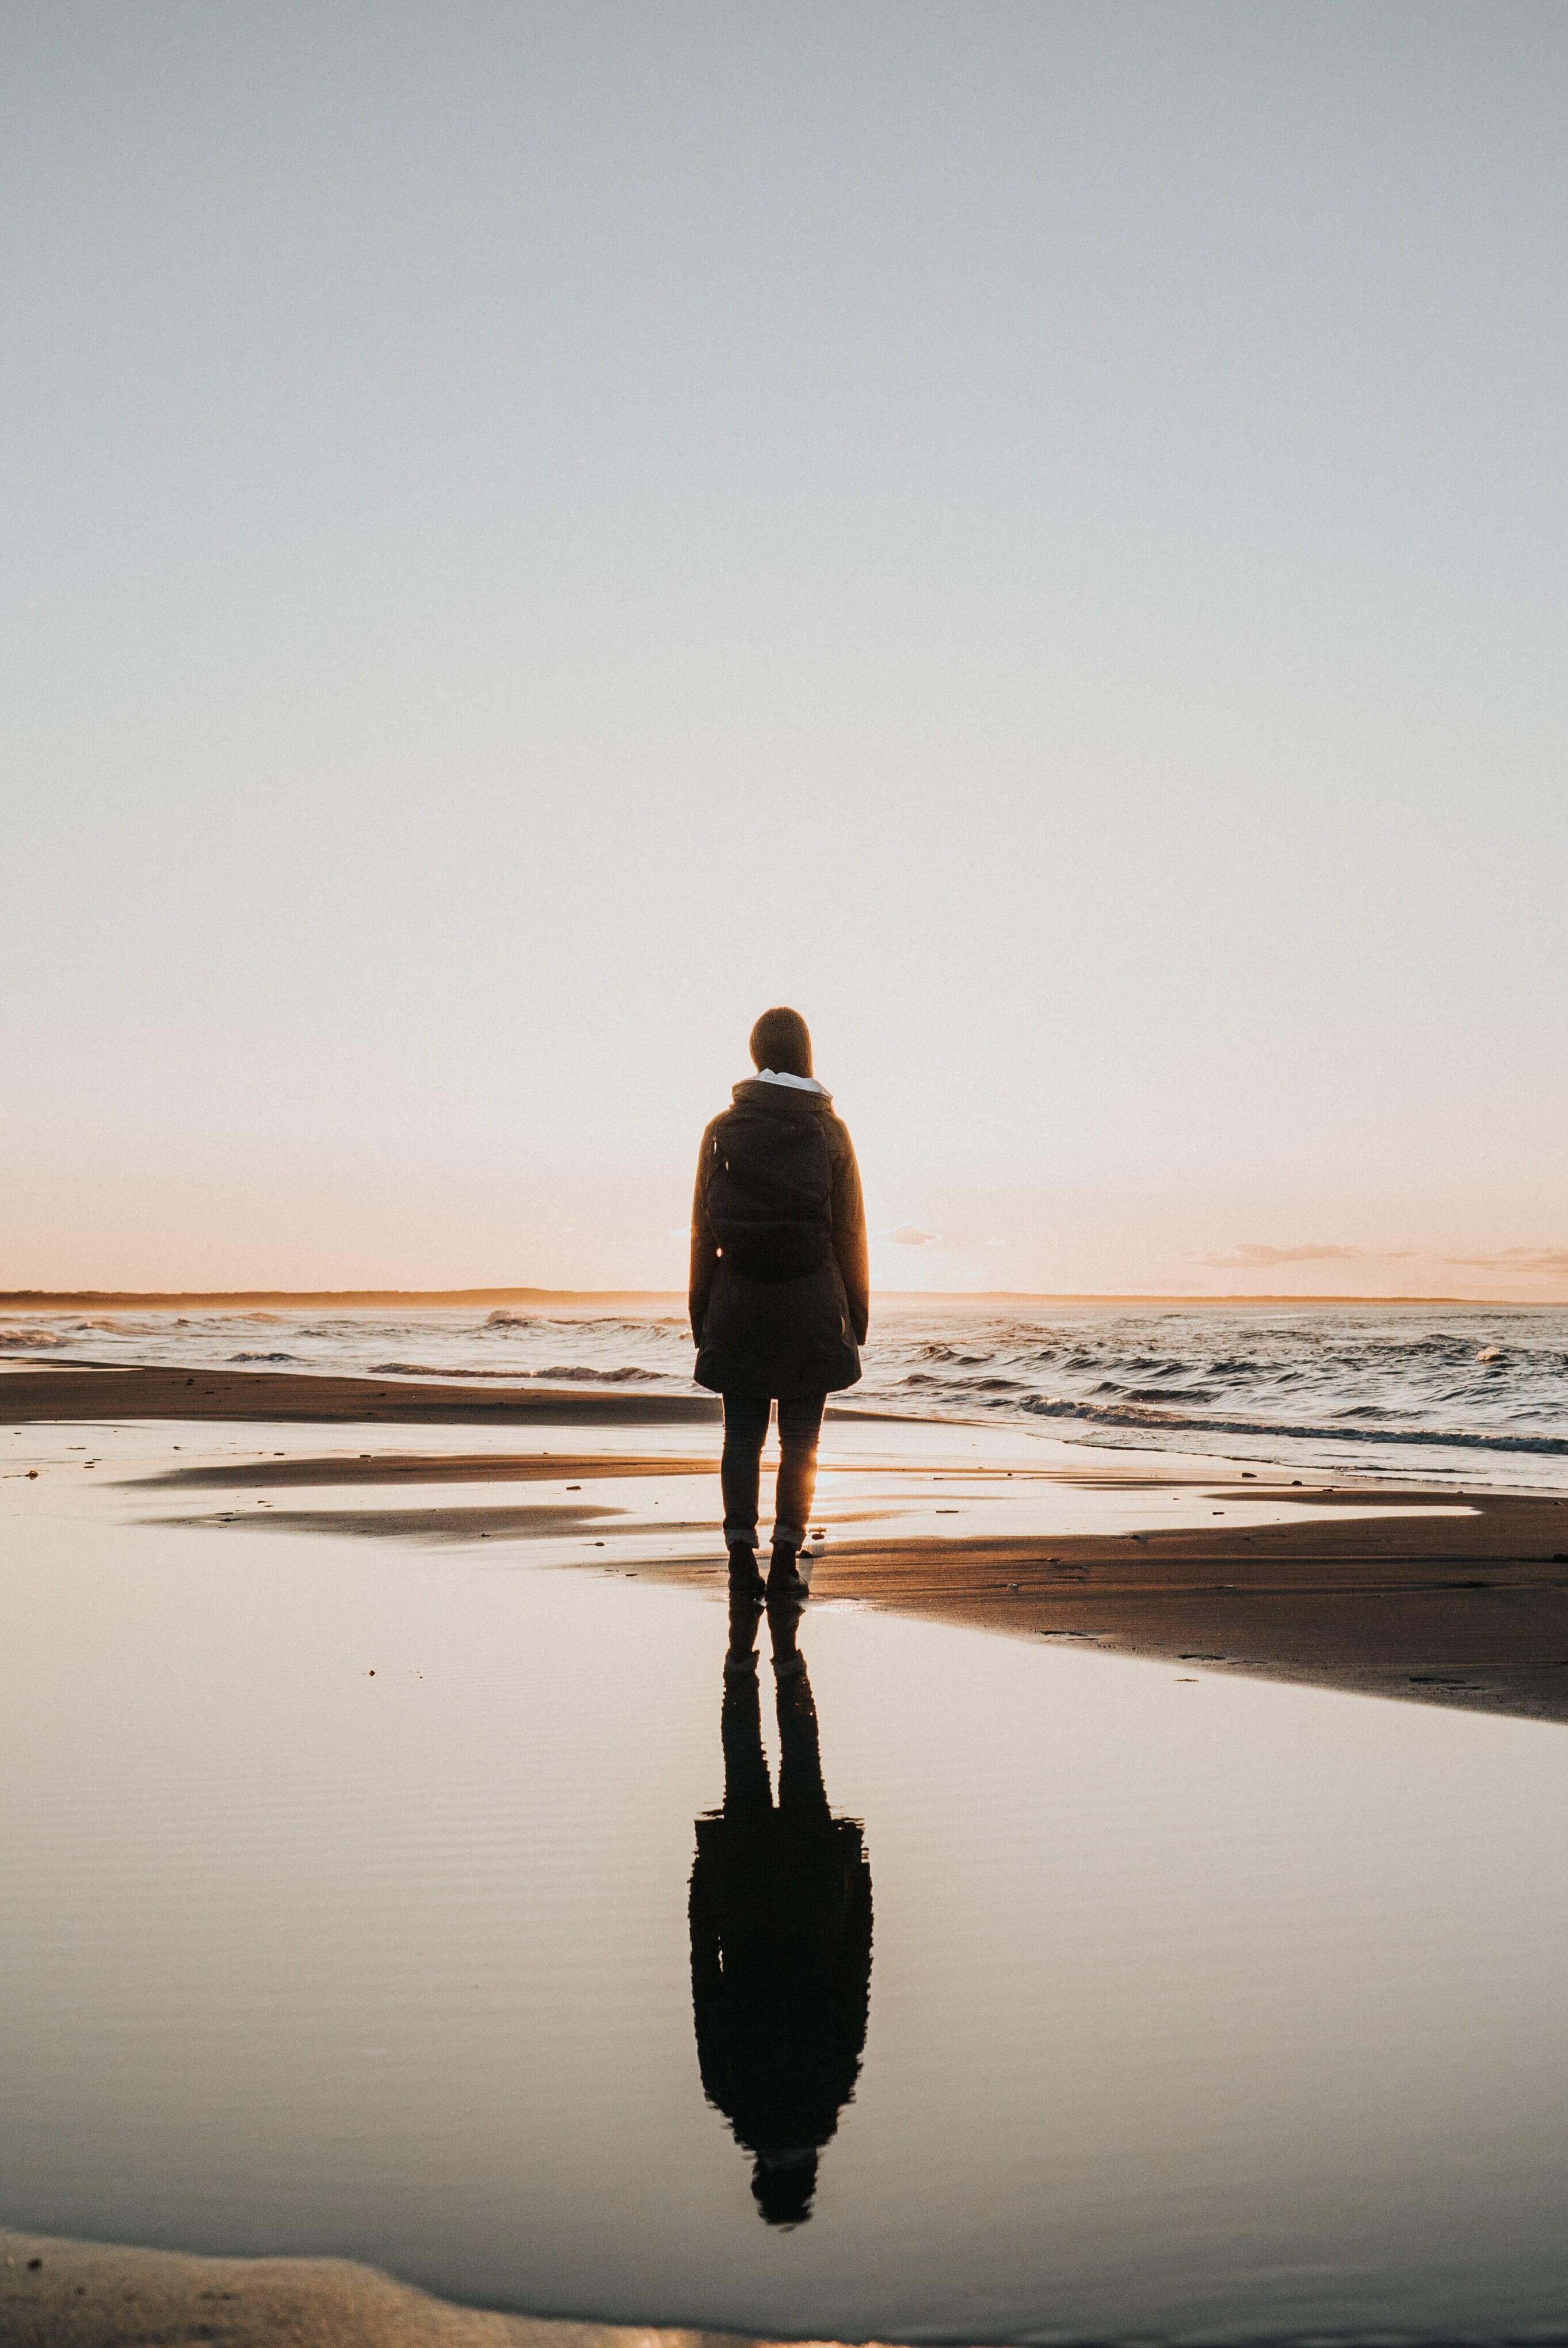
Note that reflection photography includes photos that are just reflections, like this one:
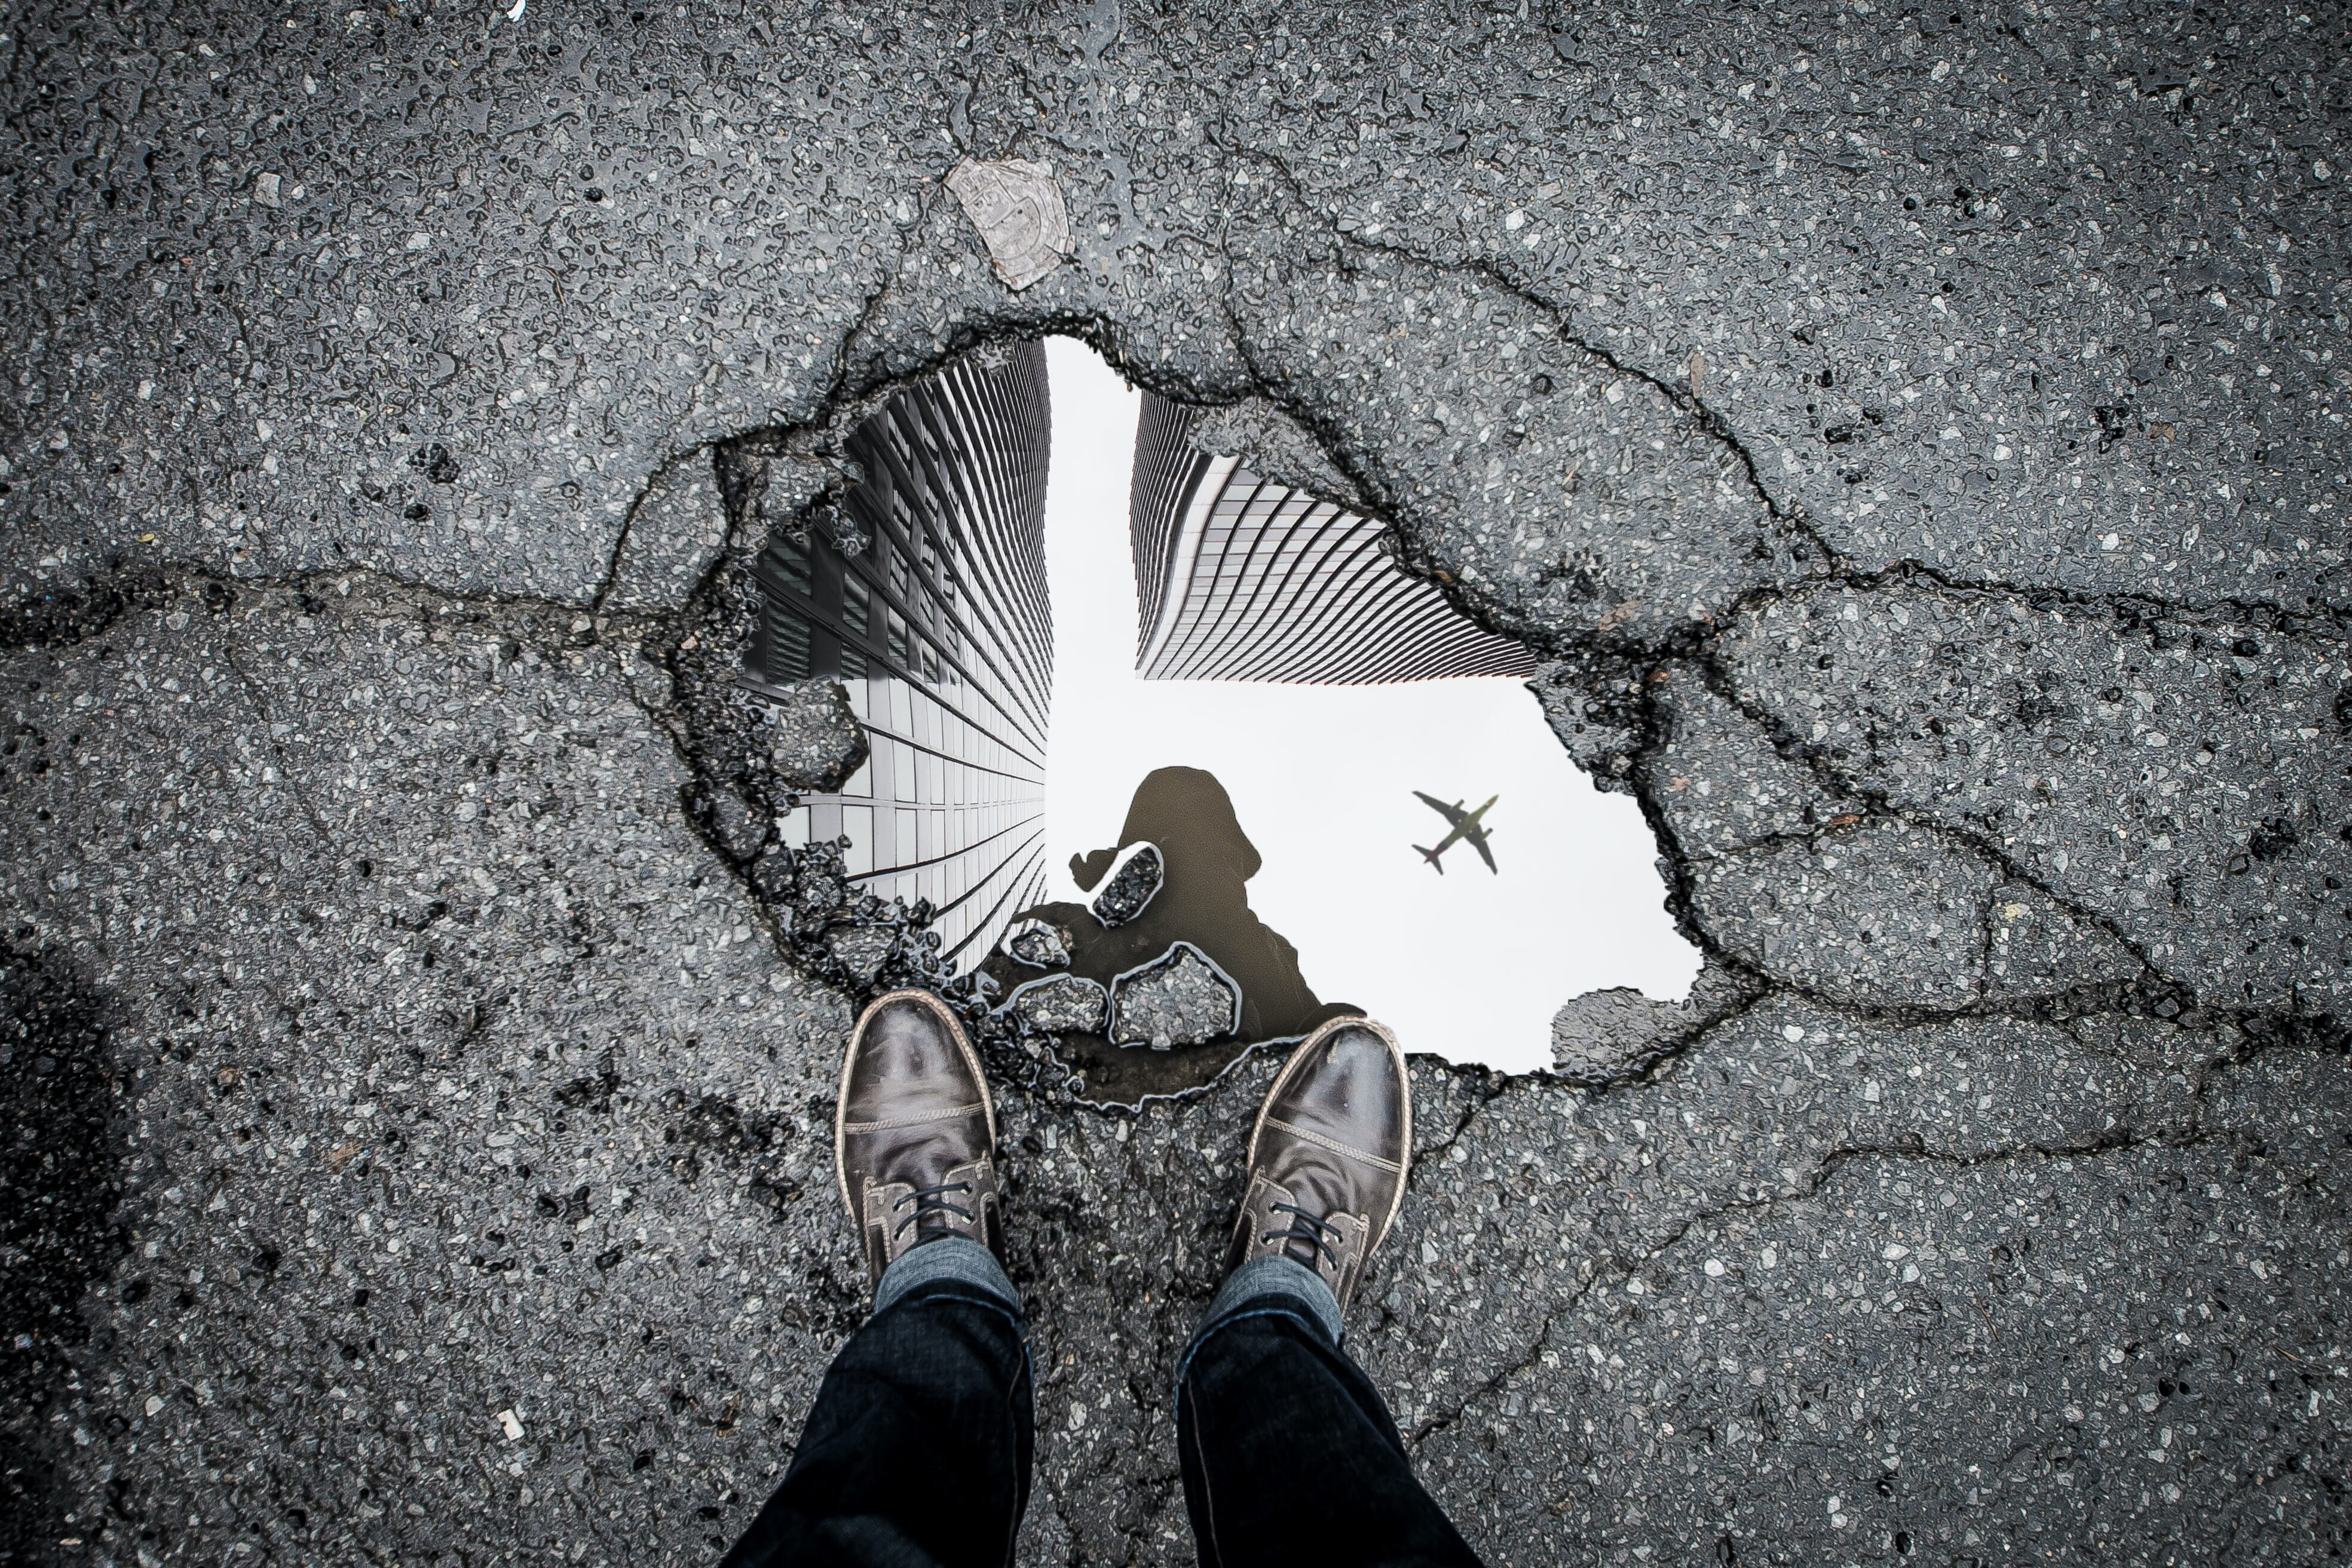
As well as photos that are a combination of reality and reflection, like this one here:
Make sense?
Now, there are some very common reflective objects, which are featured all the time in photography–mirrors, for instance, and water.
(Though the type of water you use matters quite a lot, which is something I’ll discuss in a bit.)
But there are also other, less obvious reflection choices, which it’s a good idea to remember, in case you run out of ideas when shooting.
What Objects Can You Use to Create Reflections?
As I mentioned above, mirrors are the most basic way to create reflections. If you’re photographing a person, you can position them near a mirror while taking shots. Or you can use a mirror to nab a selfie-type image.

But while mirrors are great tools for reflection, I don’t recommend them for more serious reflective photography, unless you’re going to incorporate other aspects of the scene into the shot–beyond just the mirror, I mean.
Here’s why:
If you use a perfect reflector like a mirror, you’re just going to get a very accurate rendition of the scene. The reflection won’t add anything more; it won’t add anything extra.
And, as a photographer you generally want to create something beyond the basics.
So instead of just photographing a person in a mirror, try to get a shot of a person in a mirror but photograph the mirror as part of a wider, more interesting scene.
Personally, I far prefer using water for reflections, because it adds an interesting quality to the shot–like it’s almost reality, but not quite.

You can also use car hoods and car windows to create reflections, especially if the car is very clean.
And you can get reflections in store windows, in puddles on the ground, in the facades of shiny buildings, and much more.
So now let’s take a look at some tips and tricks for creating amazing reflection photography, starting with:
Remember the Law of Reflection to Position Your Camera
The law of reflection states that light comes off opposite to how it comes in.
So if light hits a surface at 45 degrees from the right, it’ll bounce off at 45 degrees to the left.
Why does this matter?
Because it means you can figure out the angle of your camera to the reflector.
And then you can understand exactly what the camera is going to photograph, in advance.
So, if you’re photographing a reflection in a puddle of water…
…as you get down lower, you’ll see less of the sky and more of the horizon.
And as you stand up higher and point your camera down at the reflection, you’ll see more and more of the sky (until, once you get directly above the reflection, you see yourself).
Make sense?
This is an instrumental piece of information for anyone trying to set up a shot in advance. You must position your camera at the angle opposite the thing you’re trying to photograph.
Of course, if you have the time, you can always experiment with different angles, and I highly recommend this.
For instance, you might try capturing a puddle shot from very low down, which will decrease the amount of the sky that’s reflected.
And then you might try moving to the left or the right, to include different buildings.
And finally, you might get up higher, so as to include yourself in the frame.
There’s a lot of options, and if you don’t experiment, you’ll miss out on some great opportunities.
And speaking of different opportunities:
Don’t Be Afraid to Come Back at Different Times
Reflections are affected by the quality of the light.
Which means that you’ll end up with stronger reflections at different times of the day.
For instance, when the sun is very bright, you’ll end up with intense window reflections–but, on overcast days, or when the sun has dropped below the horizon, the reflections become much more minimal.
That’s why I recommend you come back to the same spot, over and over again. You’ll get lots of different shots, even using the exact same composition, simply due to the changing quality of the light.
Plus, if you come back at different times, you’ll get different skies, which is always fun; it means that you can get some reflections with clouds, others with clear blue skies, and others with sunsets.
It’s also worth noting that the sun itself can appear in your reflections, if you position your camera correctly.
But, because the sun moves across the sky, you’ll end up with the sun in your shots only at specific times.
So to get a few different types of reflection photos, try shooting with and without the sun (by coming back repeatedly to the same spot!).
Make Sure the Reflection Intersects With the Reflective Object in a Pleasing Way
Whenever you capture a reflection, you’re going to have a reflective object.
That’s the object in which the reflection occurs.
Now, some reflective objects are smooth and basically unnoticeable, like mirrors.
But if you photograph a building, for instance, the building will probably have square windows of some sort, where the reflection goes in and out, like this:
Well, in that sort of shot, you need to be careful. You must assume that the windows are part of the composition, and position the reflection so that it fits properly within the window frame.
Does this make sense?
What I’m saying is that reflective objects contribute something to the scene. You can’t act like they don’t exist; instead, you have to incorporate them into the shot.
So if I were taking a photo of a person walking by in some windows, I would position the person so that they weren’t cut in two by the windows, but instead was clearly placed within the windows.
(Assuming that was what I was after, of course! Perhaps a partial reflection in that scenario would be kind of interesting, in which case I would try that, too.)
The point isn’t that you need to always make sure your reflection isn’t broken by the reflected object.
It’s that you need to pay attention to the reflector object, and make sure that you recognize how it affects your composition. Treat it like just another compositional element.
That way, you can get higher-level reflection photos.
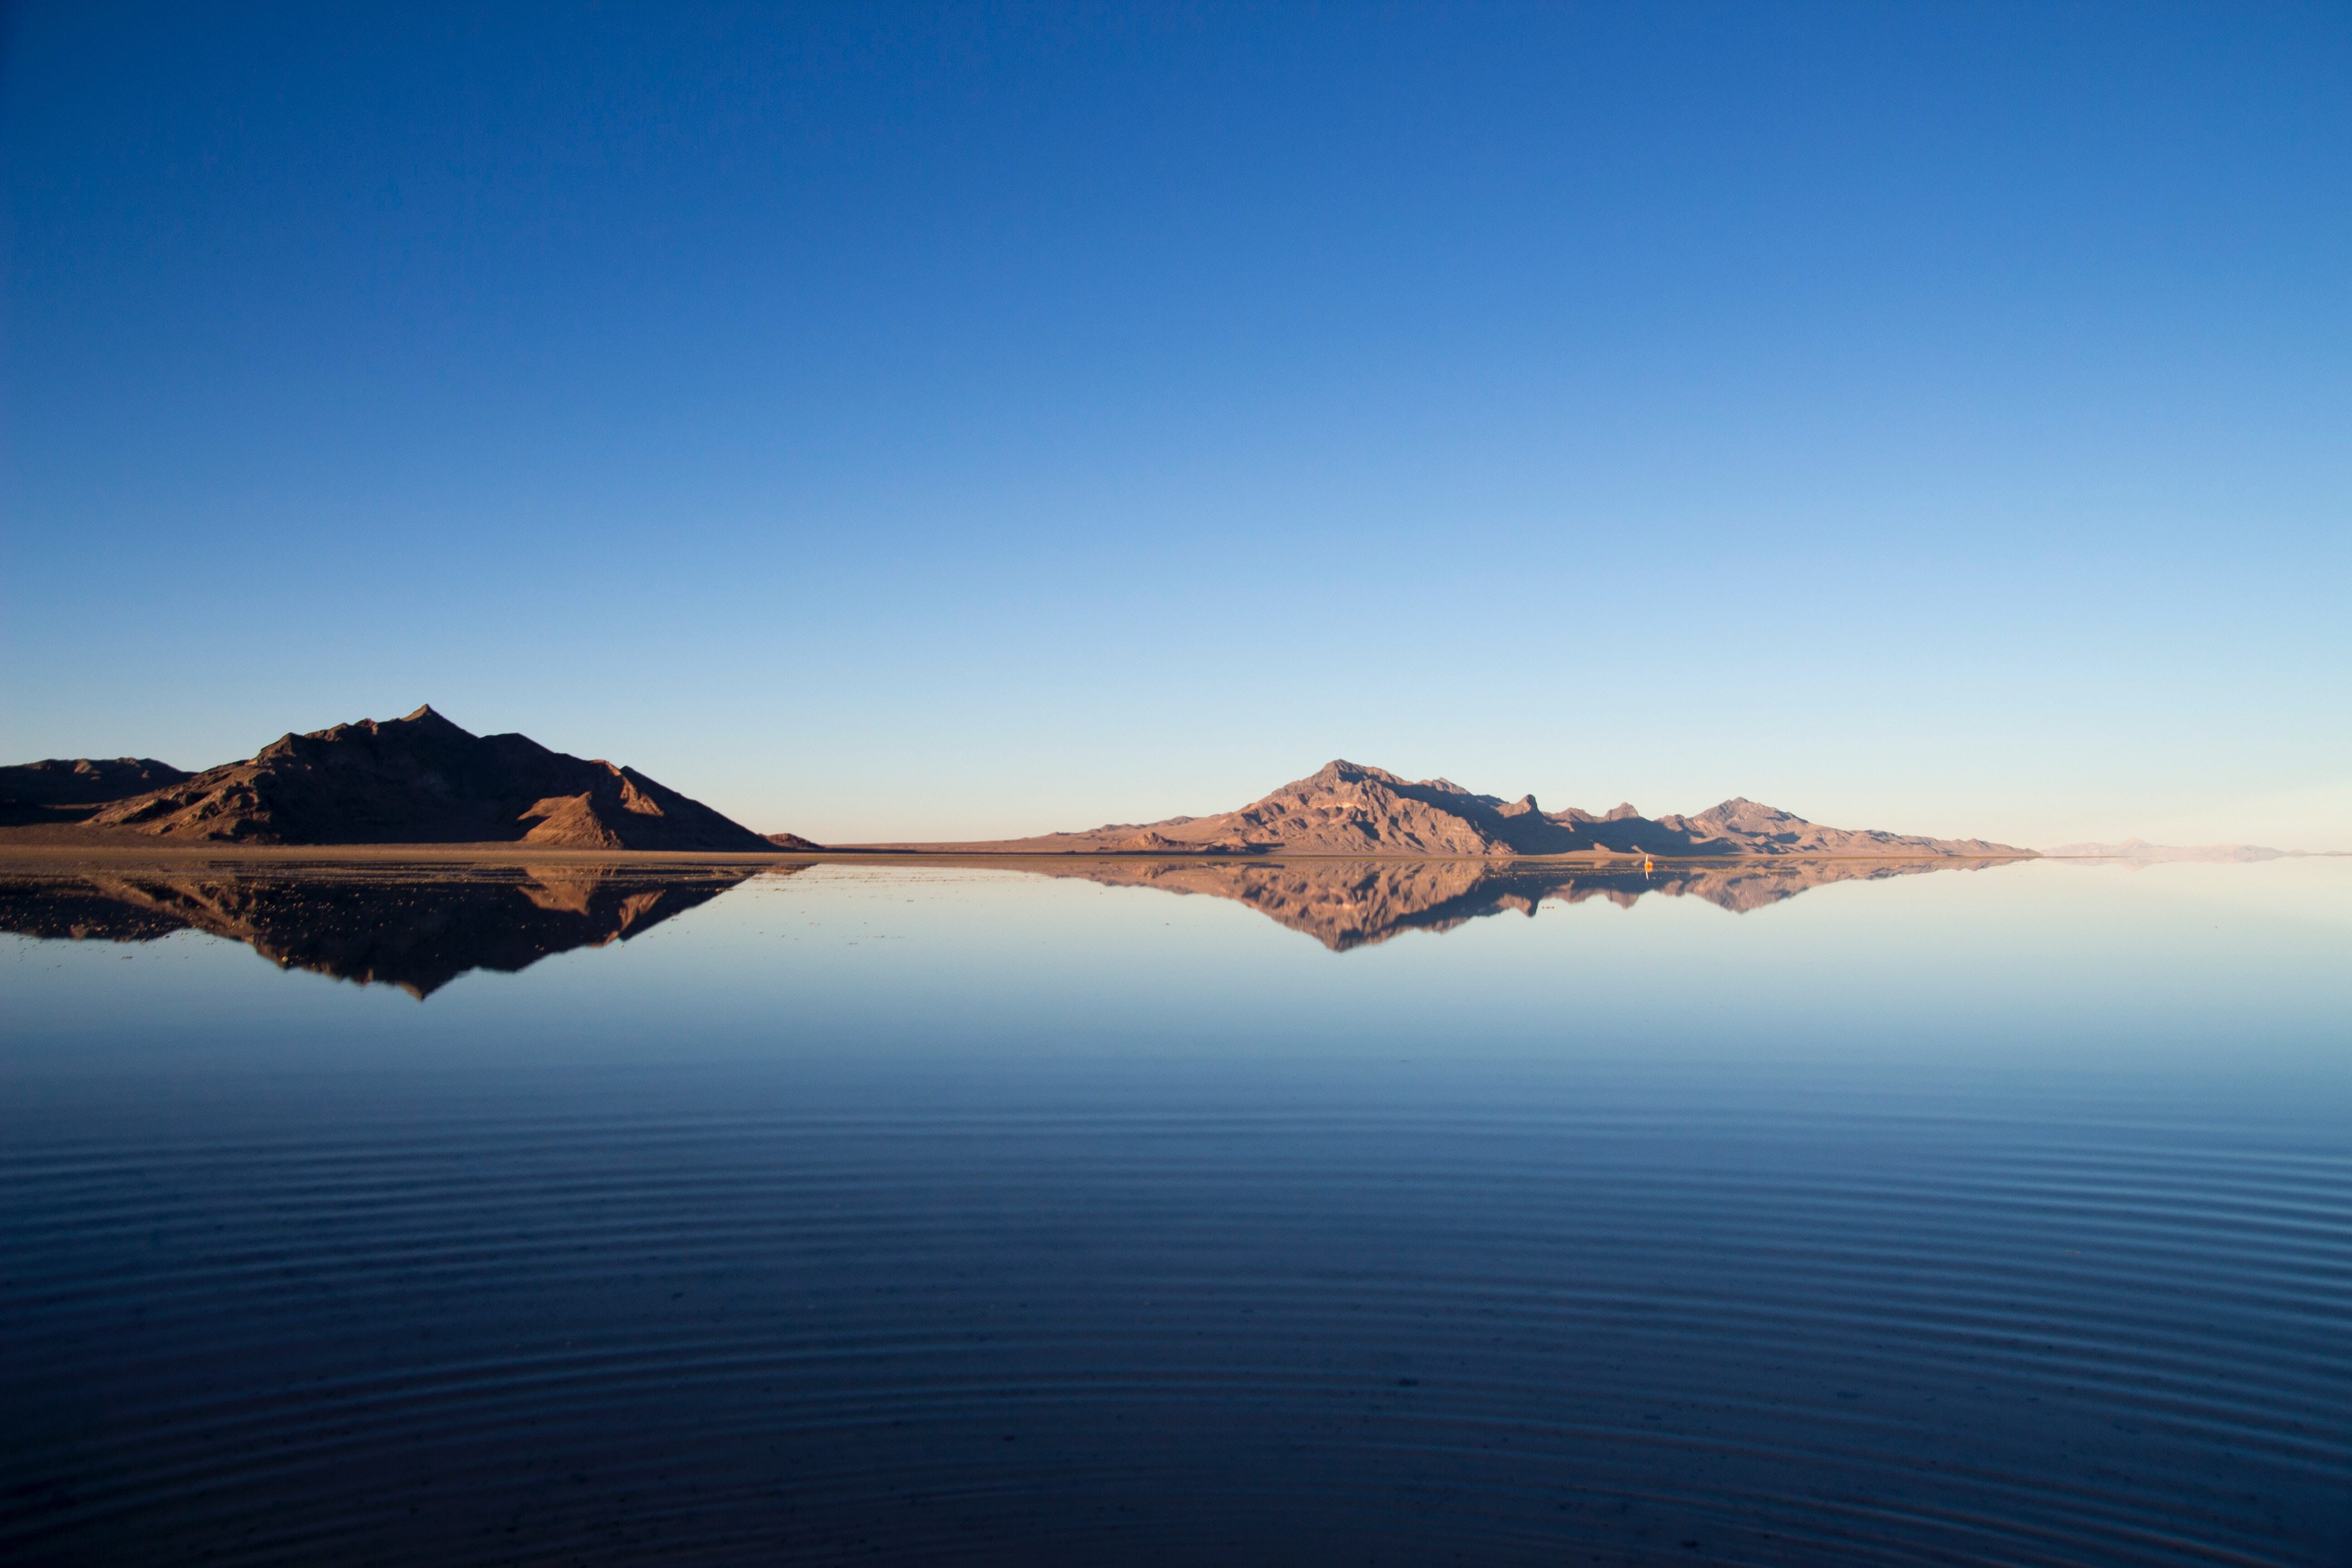
Shoot Water in the Early Morning for Perfect Reflections
Perfect reflections are a great way to really set off an otherwise mediocre scene, which is why it pays to know how to create them.
Of course, if you’re photographing in a solid reflective object, a perfect reflection isn’t hard to create.
But if you’re photographing a reflection in water, you have to be a lot more careful.
You see, water that ripples will not give a perfect reflection, and this can very easily ruin your shot.
That’s what you need to shoot when the water is as still as possible.
Specifically, early morning is a great time, because the wind hasn’t yet picked up, allowing for crystal clear reflections.
I also recommend shooting in still bodies of water, such as ponds and lakes. You can work with rivers, but unless the river is very slow-moving, you’ll need to use a tripod and a very long exposure (of around 10 seconds or more) to really smooth out the water and get the type of reflection you’re after.
That way, you can get pure, gorgeous, crystallike reflections in your photos.
Capture Abstract Images in Rippling Water
While it’s great to get perfect reflections in your shots, sometimes that’s not possible.
Fortunately, there’s an alternative:
Interesting, abstract-style ripples.
Wait until the sun is low in the sky but still bright, so that the areas around the body of water are well-lit and reflect very strongly.
Then use a long lens to take some photos of the rippling water, making sure that you get a good reflection, and making sure that you photograph the water only.
This will give you a very cool abstract result, one that I love to create.
Of course, you’re also free to try zooming out and incorporating the surroundings into the scene. But this can break the interesting abstract illusion, which is why I personally prefer to go without it.
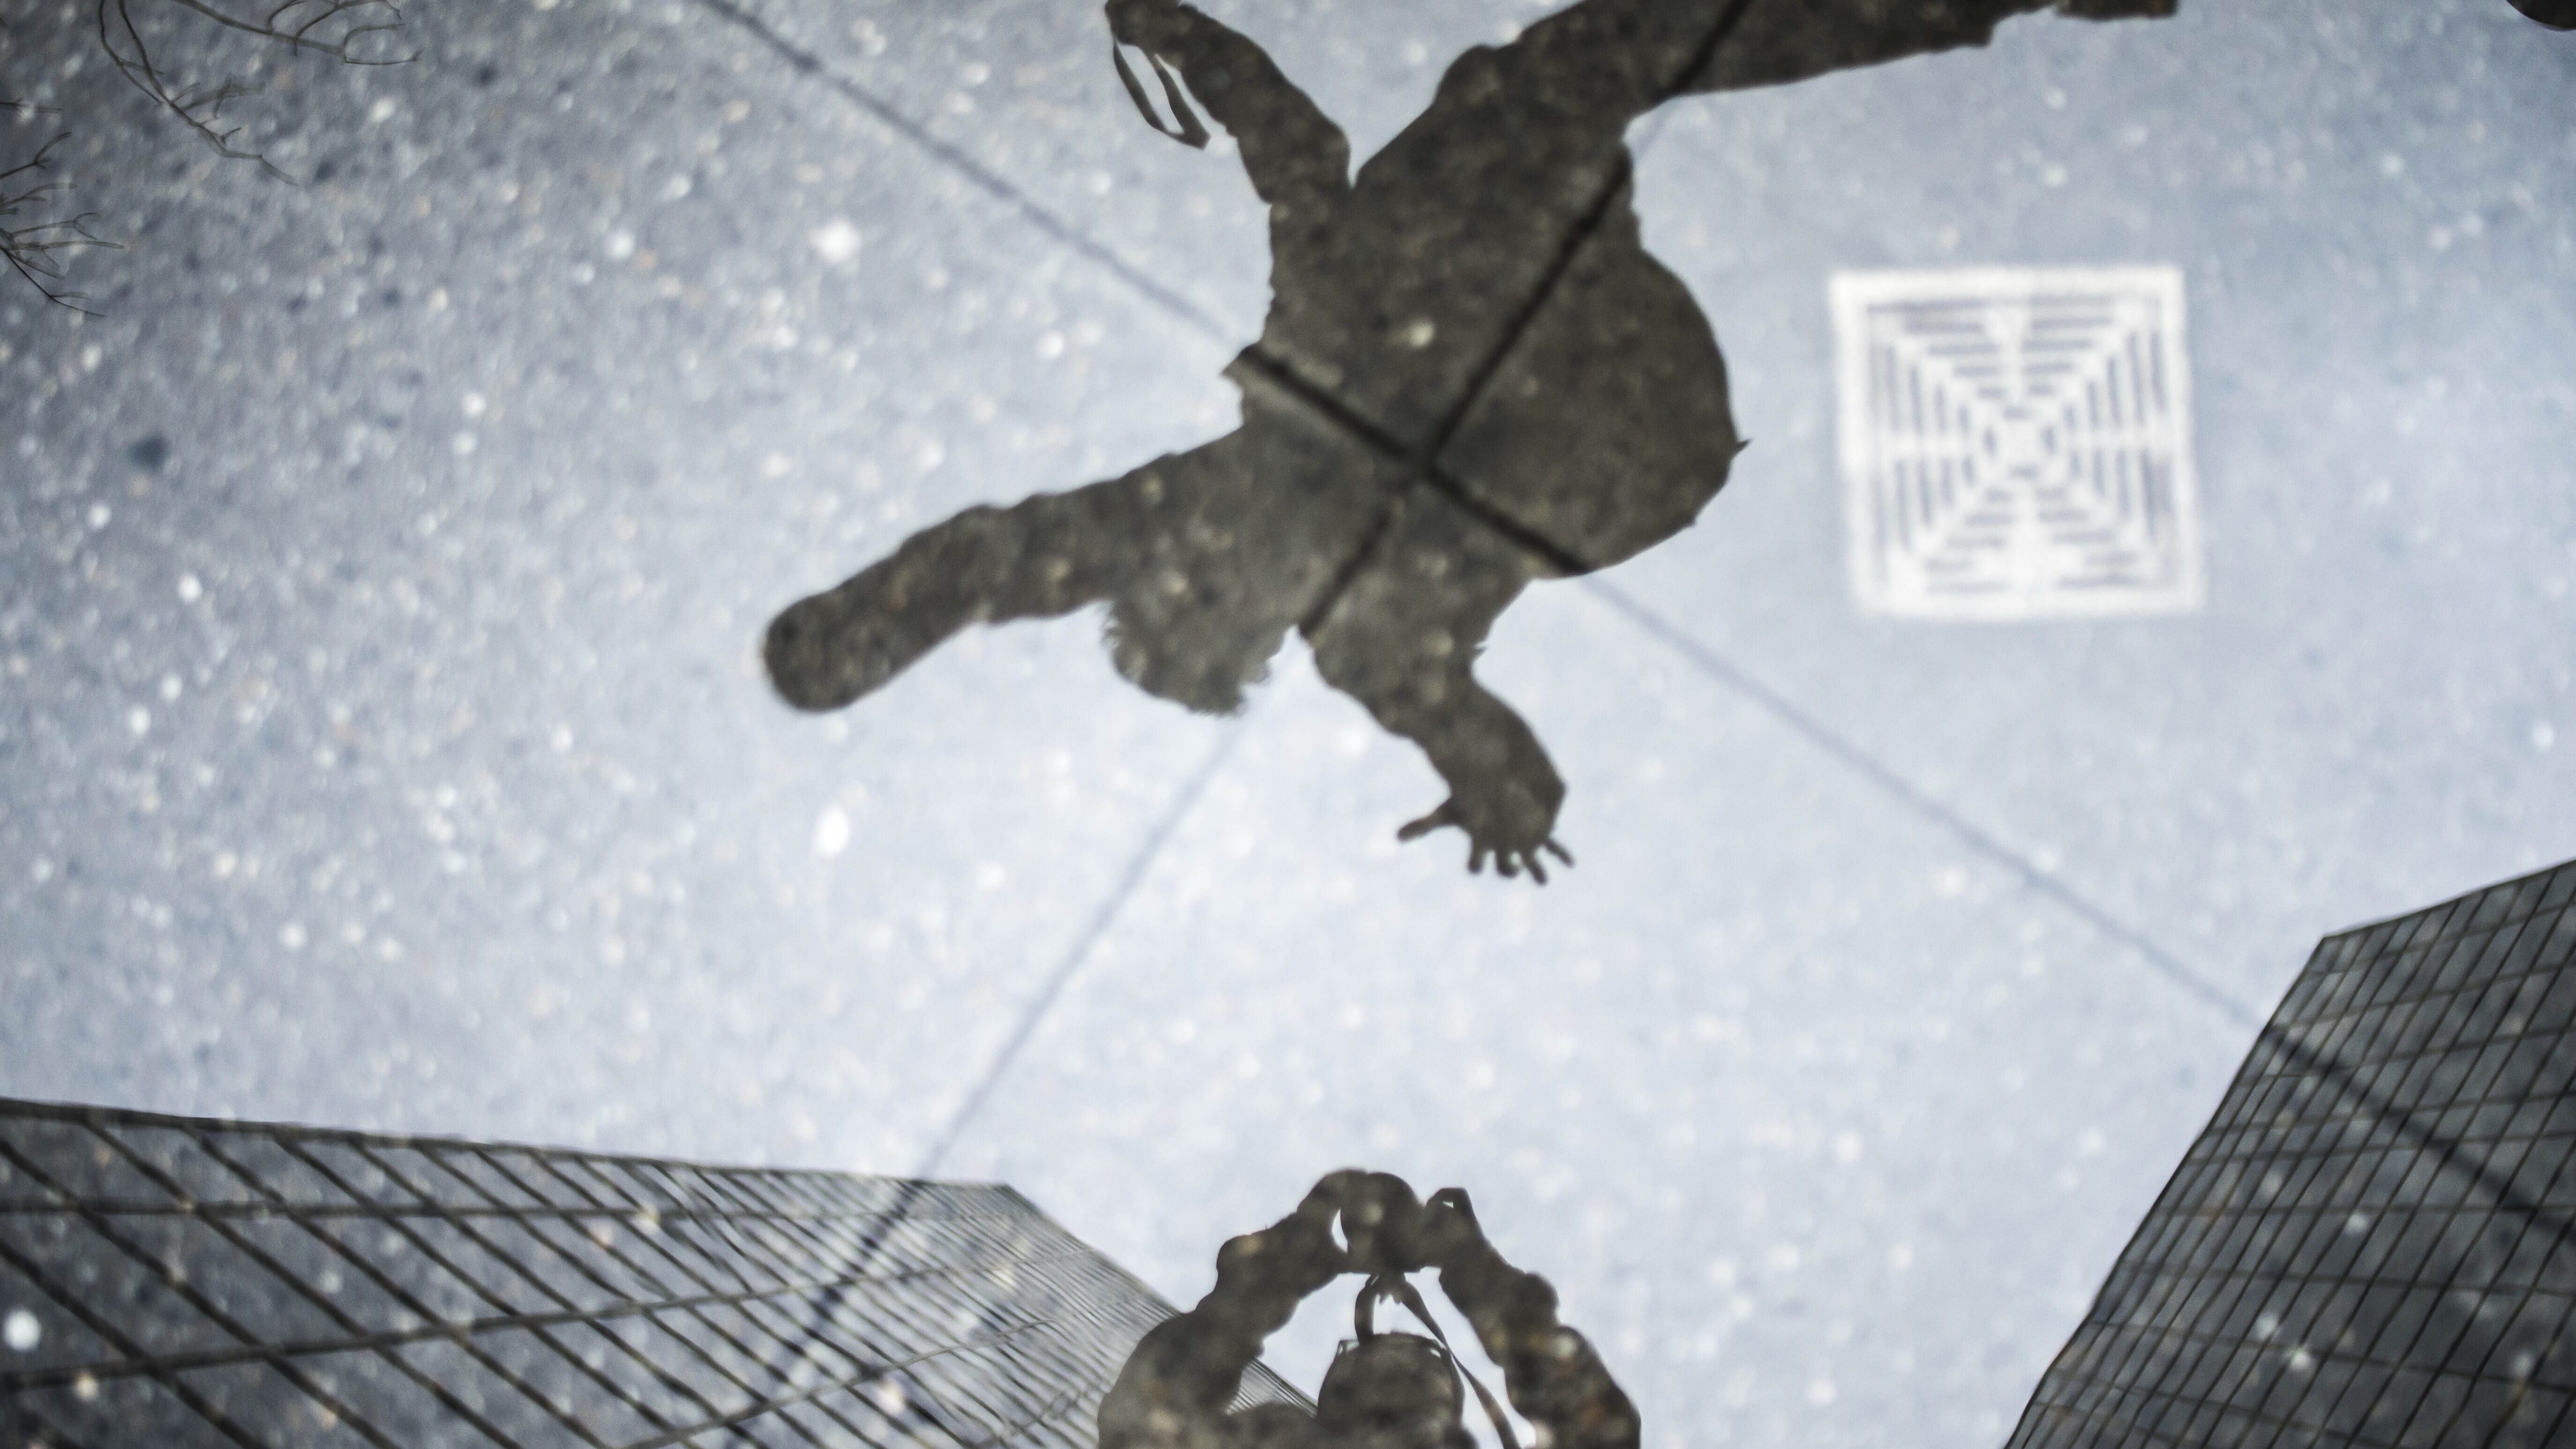
Photograph Only the Reflection for a Creative Result
When you capture reflections, you have to make a careful choice:
Do you include the reflection and reality? Or do you only include the reflection?
Both can work. As I discussed above, you can create reflections in still water that include the real surroundings, or more abstract reflections that include reflections only.
But these results are very different.
While photographing the reality plus the reflection can add something very interesting to an otherwise boring photo, there’s something extra-special, and even magical, about including just a reflection.
You get a shot that looks almost, but not quite, real.
And, if you want to be especially crafty about it, you can flip the reflection upside-down, so it’s not clear whether the shot is a reflection or not. That leaves the viewer with something to ponder, and will cause them to engage even further with the image.
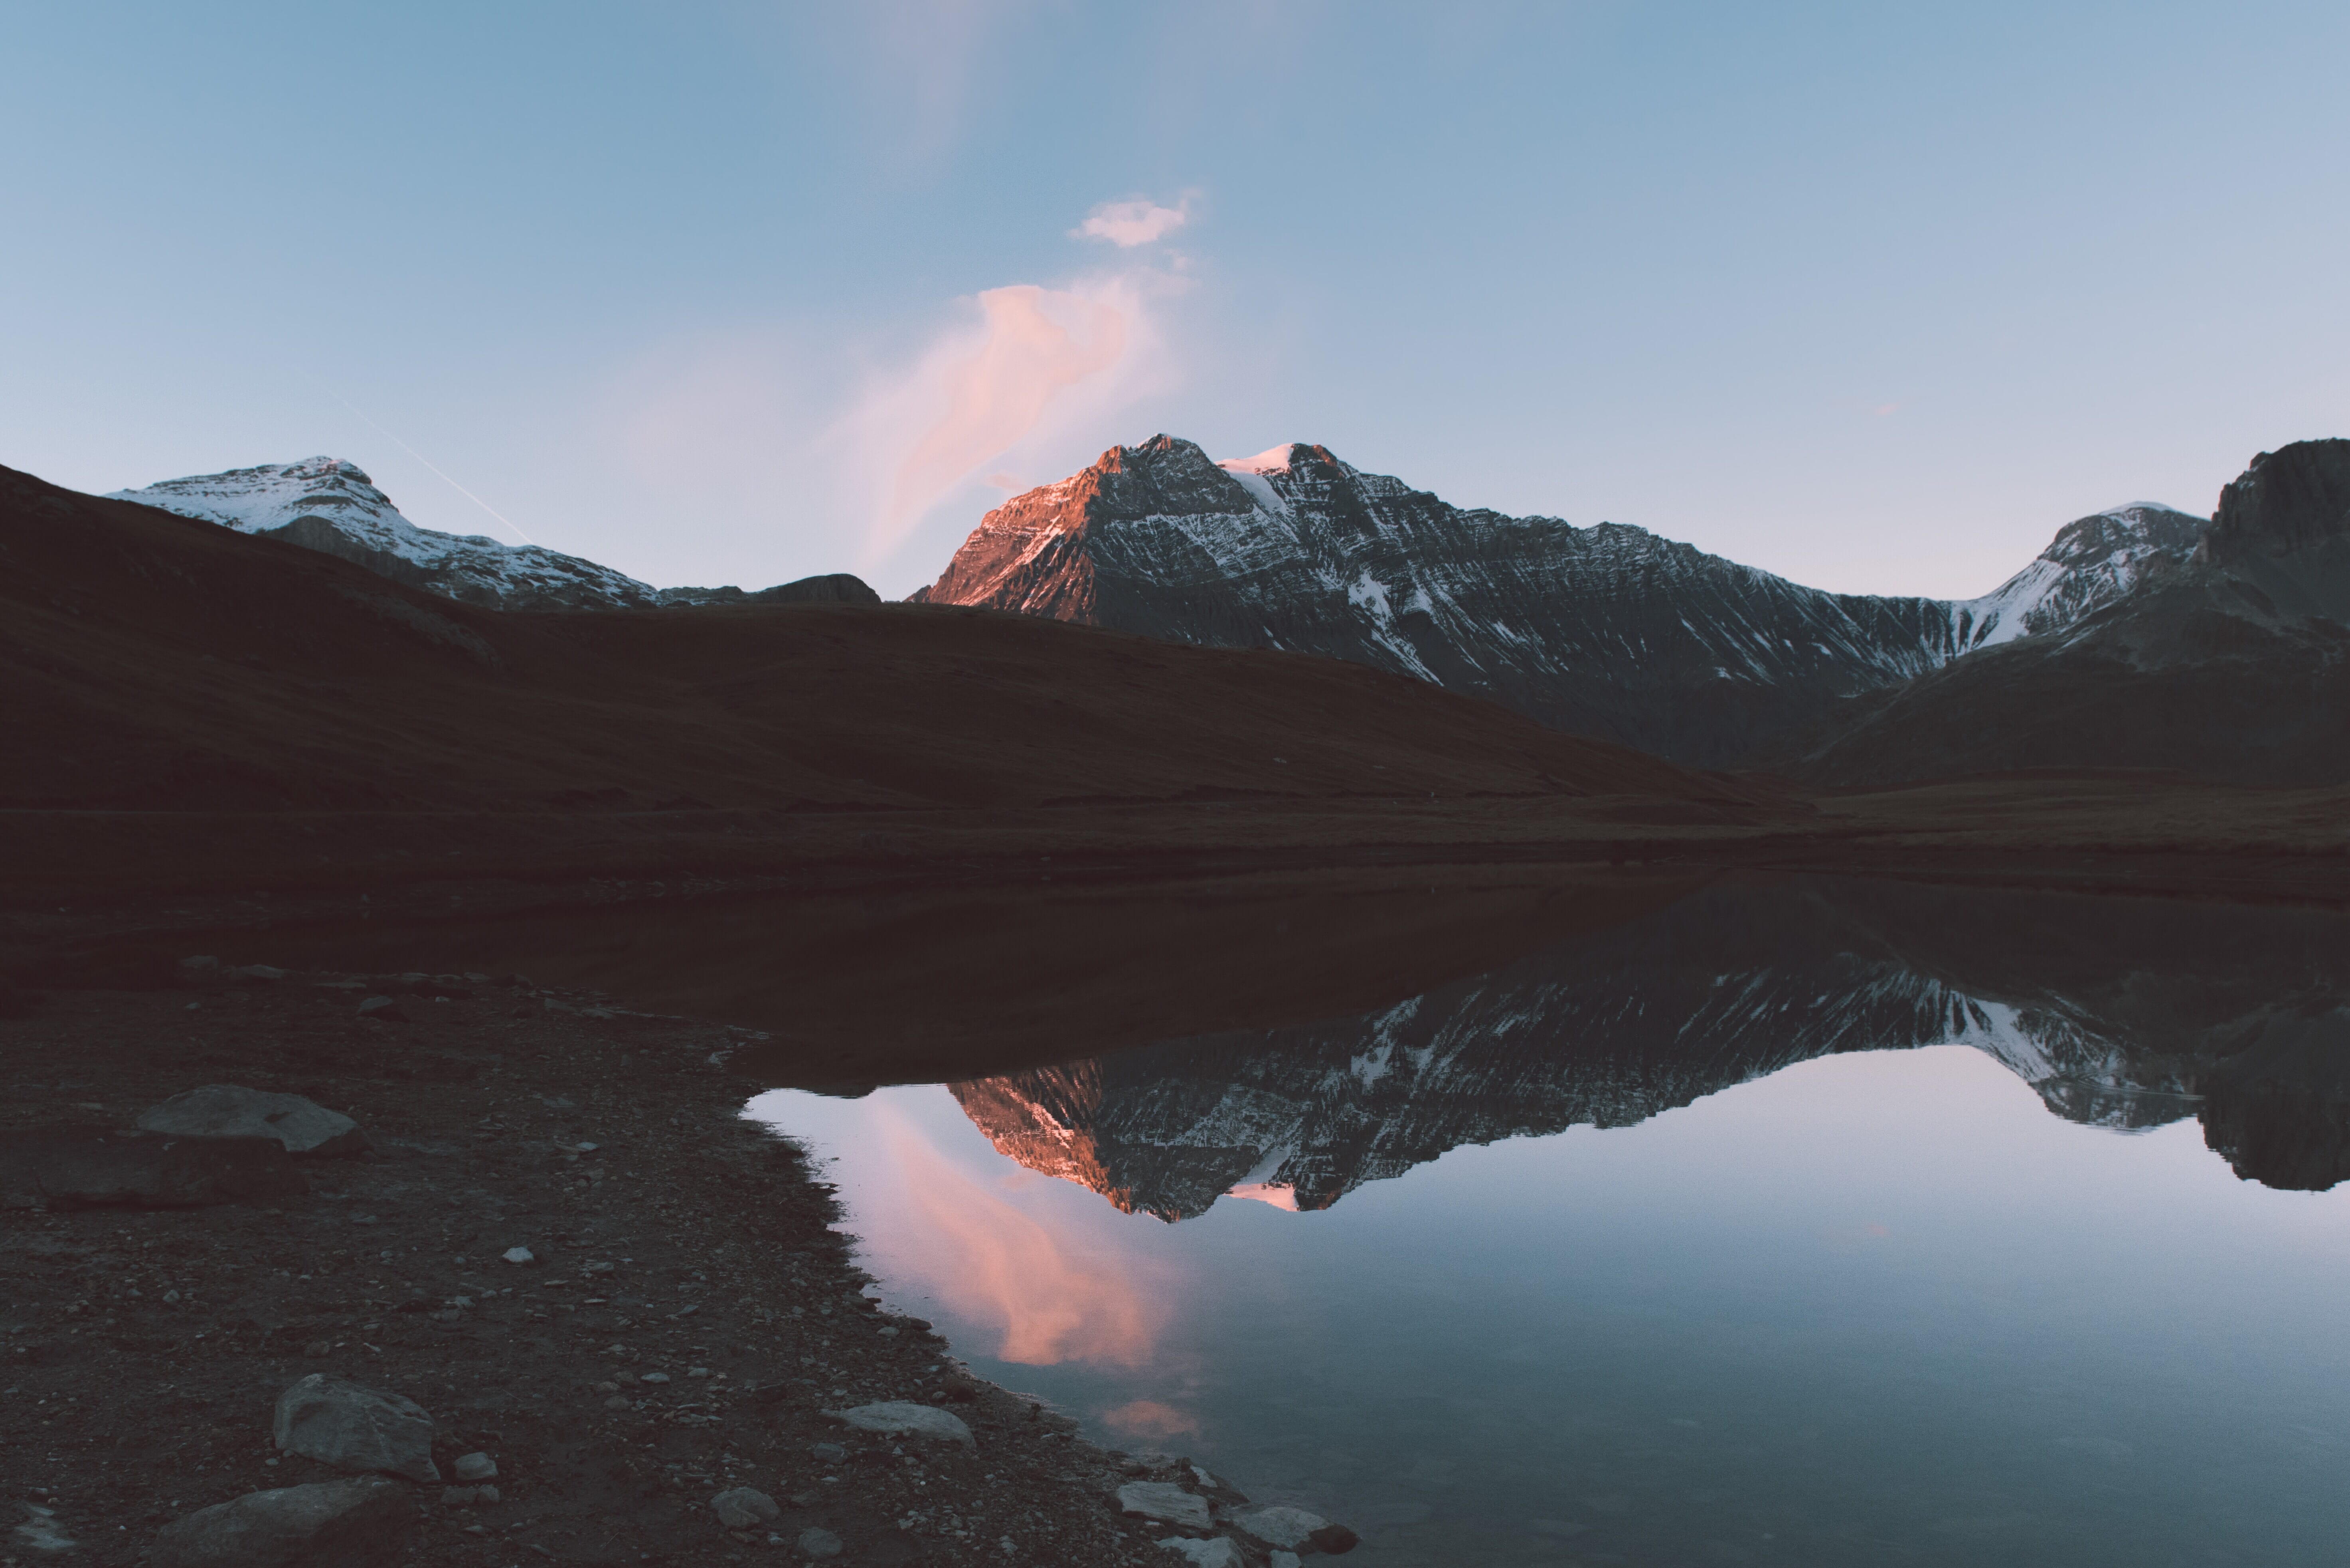
Center the Line of Reflection in the Frame
If you do decide to include both the reflection and reality, you’ll often end up with a key question:
Where should you put the line of reflection (that is, the place where reality ends and the reflection begins) in the photo?
Do you put it along a rule of thirds gridline, a third of the way into the frame?
And if so, do you allow the reflection to take up more of the scene, or reality?
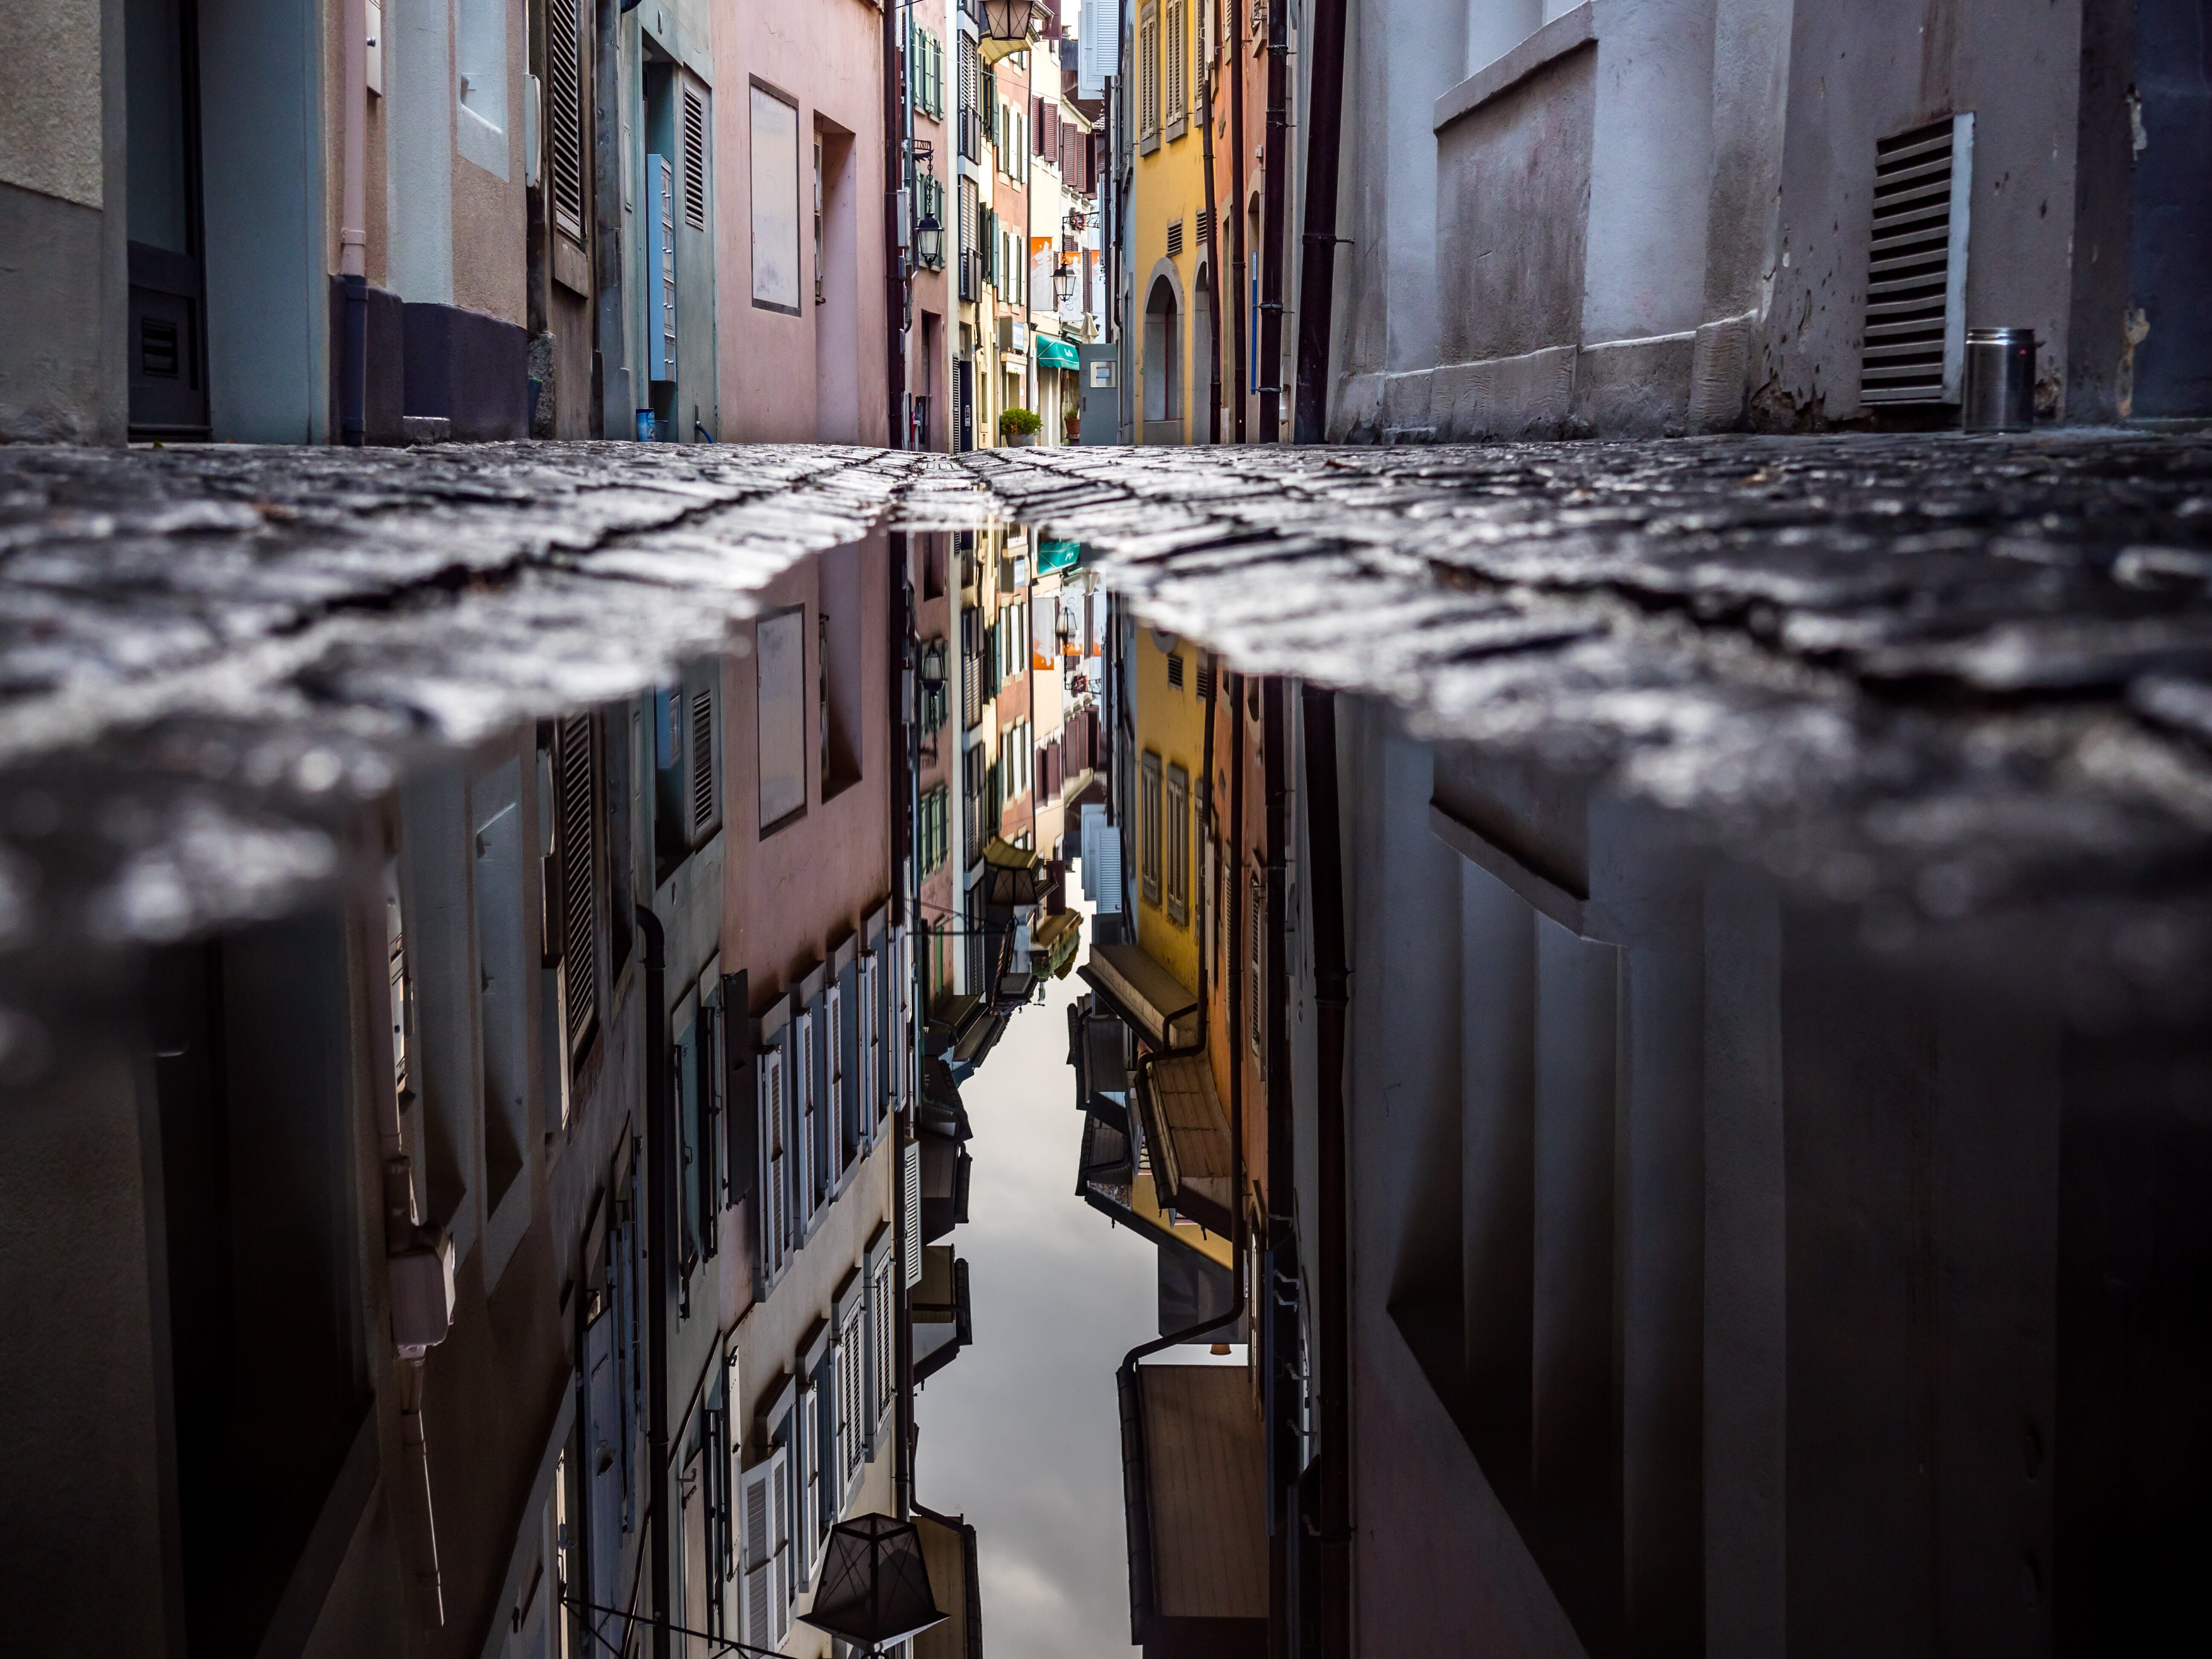
While using the rule of thirds to position a line of reflection can work well, I’d also urge you to try out compositions where you center the line of reflection.
This will give you a very in-your-face result, like this:
And both the reflection and reality will compete with one another, which creates some interesting tension.
Use a Narrow Aperture to Keep the Scene Sharp Throughout
Here’s one last key reflection photography tip for you:
Keep your aperture narrow, assuming you want the shot to be sharp throughout.
You see, when you’re photographing a reflection, it may seem like you only need a very small amount of the shot in focus for a sharp result, because the reflection only exists on the surface of the reflective object.
But the truth is that the reflection is as deep as reality, which means that you’ll want to keep a lot of distance in focus (and thus requires a deep depth of field).
How do you get a deep depth of field? How do you get a shot that has both the foreground and background elements in focus?
With a narrow aperture, of course!
By selecting an aperture of f/8 and beyond, you’ll be able to keep all the key parts of the image in focus, ensuring that the whole shot has the impact you want it to.
This can be especially important if you’re photographing a reflection, but you want the surface of the reflective object to also remain sharp, such as when you’re photographing leaves in a pond in autumn, while incorporating the reflection of a tree in the background.
With an aperture of f/11 or so, you’ll get the leaves in focus, but you’ll also get the background reflection in focus.
Nice, right?
By the way, don’t let that stop you from testing out wider apertures, which give you a much shallower depth of field effect.
You can use a wide aperture for an interesting artistic result, where the reflective object isn’t in focus, but the reflection is.
So it’s always worth a try!
Master Reflection Photography: Conclusion
Now that you’ve finished this article, you’re well-equipped to capture some stunning reflection photos of your own.
So make sure that you start doing reflection photography every chance you get. I even recommend you keep an eye out for interesting reflective surfaces, then come back repeatedly when the light is good.
That way, you can start building up a portfolio of beautiful reflections, fast!
What counts as reflection photography?
Reflection photography is any photography that includes a reflection. So you can capture good reflection photos of landscapes (with still water reflecting the scene), buildings (when they’re on a river, for instance), people reflected in buildings or water, and so much more.
What surfaces can I use for good reflection photography?
Any reflective surface you can find! Water is a very common one, as are mirrors, but you can also go for car hoods, shiny building facades, and windows. Don’t be afraid to get creative!
How do I adjust the camera angle for good reflections?
To determine what will appear in your reflections, you should use the law of reflection, which states that the light comes in at the angle opposite to which it goes out. In other words, if the light bounces in from the left at a 45-degree angle, it bounces out from the right at a 45-degree angle. This means that any reflection will come in at the same angle that it goes out. So if you want to include the sky in a reflection shot, you should get high above the water, and if you want to include the horizon in a reflection shot, you should get low down.
How do I create perfect water reflections?
If you want perfect reflections in the water, you’re going to need to need the stillest water possible. That means using a motionless body of water, such as a pond or a lake. You’ll also need wind at a minimum, so I recommend you shoot very early in the morning, before the wind picks up.