What is the difference between a shallow vs deep depth of field, and why does it matter for your photography?
Depth of field (DoF) is one of the most important photographic concepts you’ll ever encounter, and if you can learn to manipulate it to your advantage, you’ll instantly become a better photographer. That’s why, in this article, I’m going to share everything you need to know about shallow and deep depth of field, including:
- How to achieve the perfect DoF
- When to use a shallow or a deep depth of field
- Lots of examples depicting the power of different DoF effects
- Plenty of helpful tips along the way
Let’s dive right in.
Shallow vs Deep Depth of Field:
What Is Depth of Field?
Depth of field refers to the zone of acceptable sharpness within a photo.
So if you’re photographing a tree, and only a branch is sharp, then you’ve produced a shallow depth of field. On the other hand, if the branches, the trunk, and even the space in front of and behind the tree are in focus, then you’ve produced a deep depth of field.
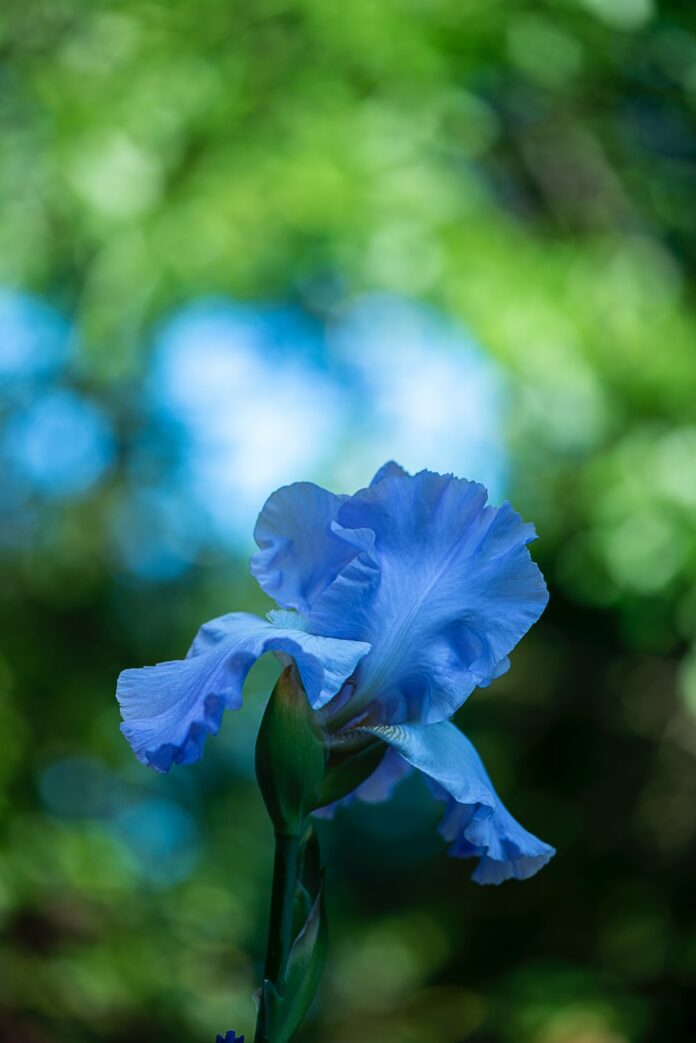
You’ve undoubtedly encountered plenty of shallow and deep depth of field examples, even if you didn’t realize it at the time. Shallow depth of field photos have very little in focus (remember, the zone of acceptable sharpness is narrow), so they’ll generally have a clear background blur, like this:

Deep depth of field photos are the opposite, packing in plenty of sharpness throughout the scene. In a deep depth of field photo, you can often pick out every detail:
The key takeaway here is simple:
Every photo has a zone of focus, and depending on several factors (explained in a later section!), you’ll end up with a shallow zone of focus, a deep zone of focus, or somewhere in between.
Now let’s take a look at shallow and deep depth of field in more detail:
Shallow Depth of Field Explained
A shallow depth of field refers to photos with only a sliver in focus.
So a portrait with a shallow depth of field might only have the subject’s head, or even just the eyes, in focus, while the background is blurred into oblivion:
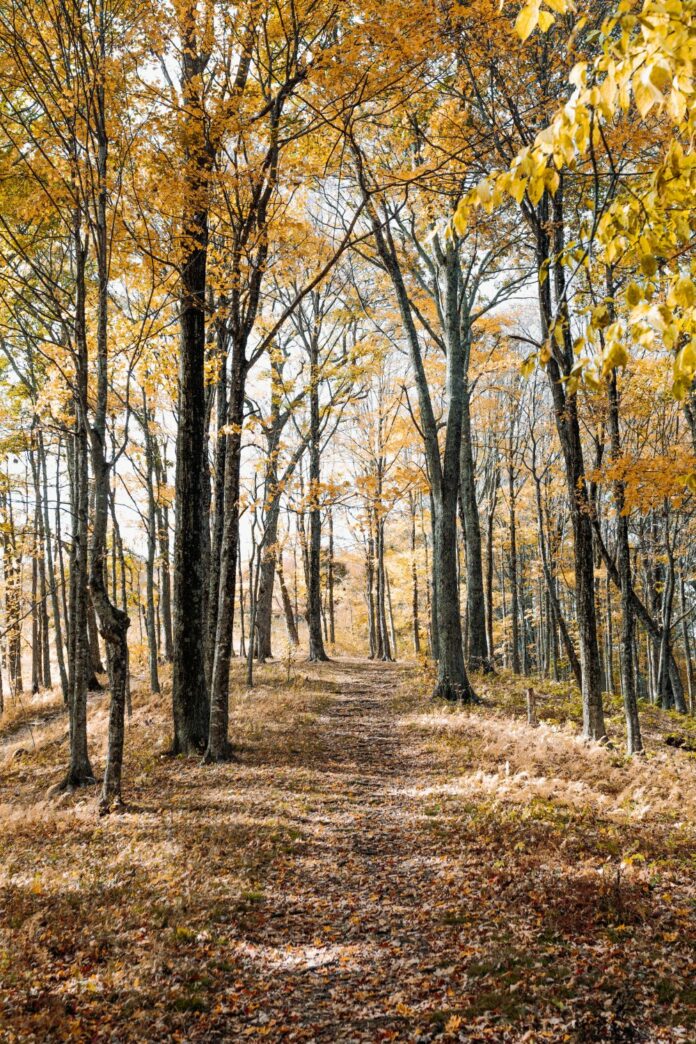
And a forest landscape with a shallow depth of field might only have a leaf or two in focus, while the trees fade into softness:

A shallow depth of field is super useful when you want to make your subject pop off the background. For instance, if you’re photographing a person in front of a busy forest scene, to emphasize the person, you’ll need to blur out the leafy backdrop.
But how can you actually produce a shallow depth of field?
There are three simple ways. Let’s tackle them one by one:
Use a Wide Aperture
The wider your lens aperture, the shallower the depth of field.
And you can set a wide aperture by dialing in a small f-number, such as f/1.8, f/2.8, or f/4. All else being equal, the smaller the f-number, the narrower the depth of field, which is why shallow-depth-of-field portrait photographers often shoot with lenses that can go down to f/1.4 or even f/1.2.
Use a Long Focal Length
The longer the lens focal length, the shallower the depth of field.
So if you’re photographing a portrait subject from across a room, a 50mm lens might give you a medium depth of field, while a 135mm lens will give you a much shallower result.
Related Posts
Of course, increasing the focal length isn’t always practical – for one, changing lenses takes time, plus you may prefer to work with a single prime. That’s where the third method for reducing depth of field comes in handy:
Get Closer to Your Subject
The closer you get to your subject (i.e., to your lens’s point of focus), the shallower the depth of field.
If you photograph a football player from across a field, assuming you’ve nailed focus on the player’s body, the depth of field will be huge. But if you walk straight up to the player and shoot directly into their face, the depth of field will be ultra-shallow.
Putting It All Together
It’s important to recognize that these three factors – aperture, focal length, and distance to subject – work together to produce the depth of field in a photo.
If you use a wide aperture, a 400mm lens, and you get as close to your subject as possible, the depth of field will be insanely small. However, if you use a wide aperture, but then use a wide-angle lens (e.g., 24mm), and you shoot across a room, the depth of field will sit somewhere between shallow and deep.
Ultimately, if achieving a shallow depth of field is important to you, then you’ll likely need to adjust several elements to get the effect you want, not just one.
Deep Depth of Field Explained
Remember, a deep depth of field refers to a large zone of sharpness. So instead of blurring out the background, you’ll end up with a sharp subject and detailed surroundings.
Landscape photographers love deep depth of field because it highlights all the spectacular details in a scene, from the water in the foreground to the mountains in the background:
And architectural photographers also shoot with a deep depth of field to emphasize crisp lines and textures:

There are three ways to produce a deeper depth of field (and they’re simply the opposite of the shallow depth of field factors explored above):
Use a Narrow Aperture
The narrower your lens’s aperture, the deeper the depth of field.
So if you shoot at f/6.3, you’ll generally produce a medium depth of field. Push this to f/8, and the depth of field will become deeper; push this yet again to f/16, f/18, or even f/22, and your depth of field will become deeper still.
(Note: A narrow aperture setting does come with a couple of drawbacks, so you should always be careful before aiming for an ultra-deep depth of field. Narrow apertures are plagued by sharpness-degrading diffraction, and they also let in very little light, so you’ll often need to shoot with a tripod.)
Use a Wide Focal Length
Wide focal length lenses produce deep depth of fields, all else being equal. Shoot at 35mm, and your depth of field will be decently deep. Go to 24mm, and your depth of field will turn even deeper. And at 14mm, keeping an entire scene sharp is easy, even if you use a wide aperture.
This is one way landscape photographers manage to shoot ultra-sharp scenics all day long, by the way – they stick to 12-20mm focal lengths, which goes a long way toward maintaining a deep depth of field.
Move Far from Your Subject
As you already know, getting close to your subject decreases the depth of field – so it stands to reason that moving away from your subject increases the depth of field, right?
And it’s true: the farther you go from your subject, the greater the depth of field.
If you shoot a flower from a hand’s width away, the depth of field will be tiny. But walk back 20 paces, and the depth of field will instantly become huge.
Shallow vs Deep Depth of Field: Examples
At this point, you should be pretty familiar with shallow vs deep depth of field (also known as deep focus vs shallow focus), and you should have a loose understanding of the mechanisms that produce the different DoF effects.
In this section, I want to take you through some depth of field examples, with the aim of showcasing what depth of field can really do and why it’s such an important photographic concept.
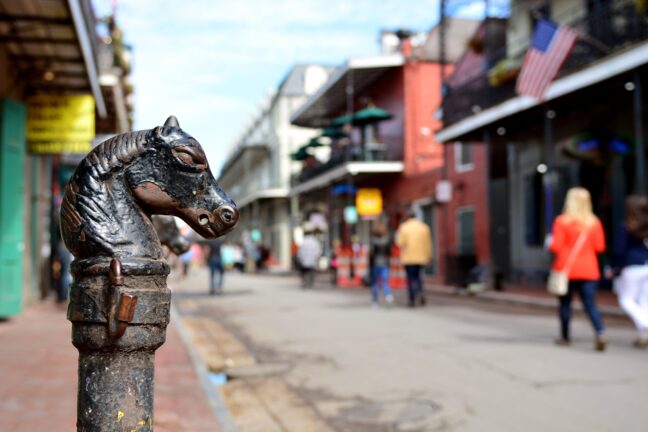
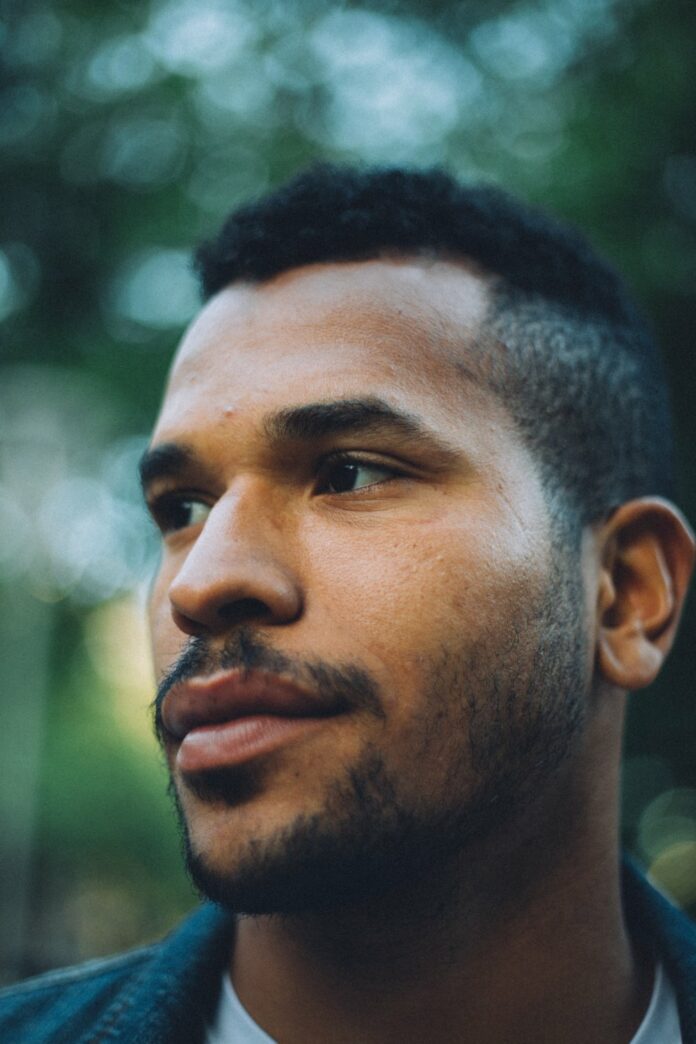
First up is a simple portrait. As you can see, the background is a set of messy amusement park rides, yet they’ve been artfully blurred by a shallow depth of field. The image was shot with an aperture in the f/1.4 to f/2.8 range, and had the photographer used an aperture of, say, f/11, the shot just wouldn’t have worked; the rides would’ve blended with the subject, and the viewer’s eye wouldn’t be able to focus.

Here’s another shallow depth of field portrait, taken close to the subject with an f/1.4 aperture. Here, it’s impossible to tell what was originally in the background – probably some trees – but the shallow depth of field effect prevents a busy background from overwhelming the viewer:

Finally, this flower close-up shot uses a shallow depth of field to minimize the distracting flowers and leaves in the background. Notice how the main flower stands out, thanks to an f/3.5 aperture, a 105mm focal length, and a tiny camera-to-subject distance.
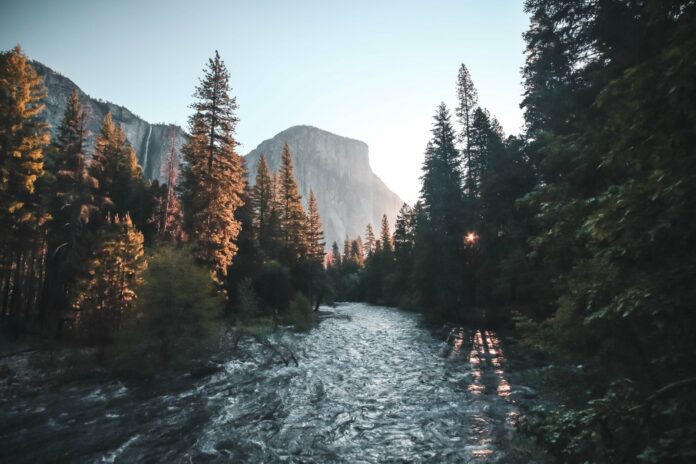
On the other hand, it’s the deep depth of field in this forest scene that pulls the viewer in and maintains their attention:
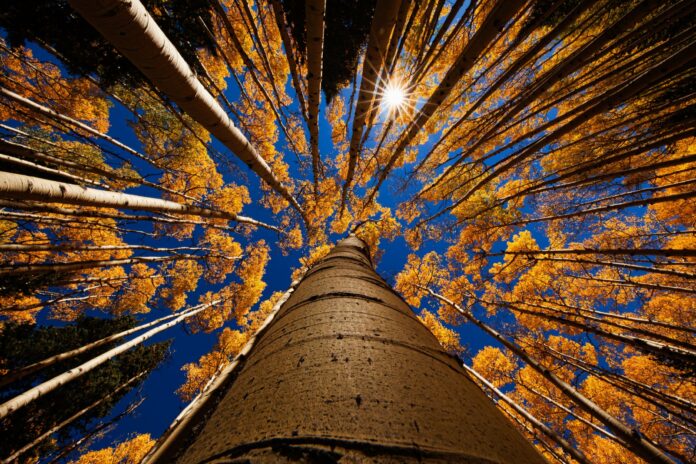
Here’s another forest scene where the deep depth of field is essential. Without the crisp lines of the trees, the viewer’s eye would start to wander – but an ultra-narrow aperture and a wide-angle focal length ensure the shot is sharp throughout.
And in this photo, a deep depth of field emphasizes the sharp lines of the building, along with the contrasting textures (glass, metal, sky, and more):

How to Achieve the Perfect Depth of Field
Now that you know how different depth of field effects are produced, achieving the perfect depth of field involves two simple steps:
- Determining the depth of field you want
- Following the guidelines above to get that effect
So look at your scene. Ask yourself: Do I want to emphasize a particular subject? If the answer is yes, then a shallow depth of field is probably a good idea; otherwise, a deep depth of field might be the better choice, especially if you want to highlight plenty of interesting details.
Then make the necessary changes to achieve the right result. Remember, for a shallow depth of field, you can:
- Widen the aperture
- Use a long lens
- Get closer to your subject
And for a deep depth of field, you can:
- Narrow the aperture
- Use a wide-angle lens
- Move away from your subject
If this whole process sounds a bit simple, that’s because it is – getting the perfect depth of field shouldn’t be hard, at least not once you know what you’re doing!
When to Use a Shallow Depth of Field
While shallow depth of field often looks artistic, there are times where it works – and there are times when it’s best avoided. Overuse of shallow depth of field is common, so it’s important you understand from the beginning when to aim for that background blur and when it’s better to keep the scene sharp throughout.
Specifically, you should consider using a shallow depth of field if:
- You’re photographing a portrait subject and you want their head/body to stand out and the background to blur (either for improved depth/separation or because the background is distracting).
- You’re doing macro photography and you want an artistic, abstract effect.
- You’re shooting street photography and you want to separate a subject from the background (or deemphasize the background chaos).
- You’re doing pet, wildlife, or bird photography and you want to make the main subject stand out.
Of course, this is hardly an exhaustive list, but do try to follow it (or at least use it as a guide). Sure, if you find a scene that just screams shallow depth of field, even if it violates the items I shared above, go for it – just don’t use shallow depth of field simply because you can.
When to Use a Deep Depth of Field
Deep depth of field is perfect for times when the entire scene matters. Perhaps it contains helpful compositional elements (like leading lines), or perhaps every portion of the scene is carefully positioned to enhance the shot.
- You’re photographing landscapes and want to create lots of depth, with a sharp foreground, midground, and background.
- You’re photographing architecture and want to accurately display the building (e.g., for a real estate listing).
- You’re doing macro photography and want to emphasize the entire subject from front to back.
- You’re shooting street scenes and you want to highlight the chaos of the environment, or you simply want to increase your zone of sharpness to improve your success rate.
As with shallow depth of field, you can use a deep depth of field in unconventional ways – when shooting portraits, for instance – but you should always be careful and make thoughtful DoF decisions.
Shallow vs Deep Depth of Field: Conclusion
Now that you’ve finished this article, you can confidently create shallow and deep depth of field effects, and you should also know when to use one option over the other.
So pick up a camera and start practicing. Test how changing the aperture, focal length, and distance to the subject affects your depth of field.
And then start incorporating the different effects into your photography!